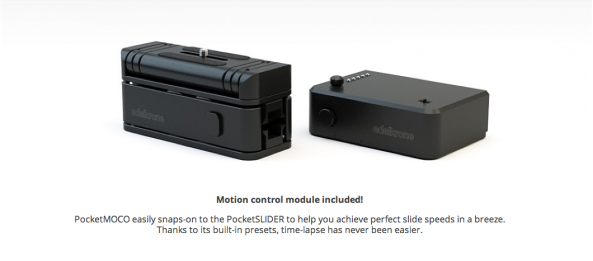
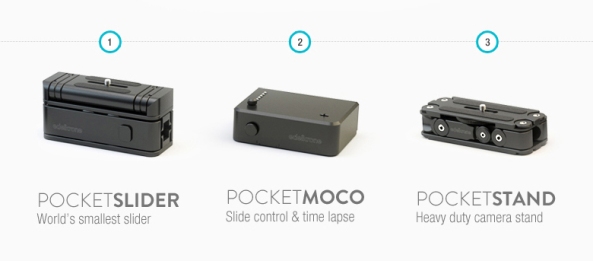
Edelkrone Pocket Slider with MoCo
First impression based on whats on the website is its very intuiting!

I wonder how its powered? I can see what looks like a DC jack on the side and possibly a battery compartment on the bottom but I cant be sure. Is the battery removable / rechargeable?
EDIT: Edelkrone’s İnanç has kindly chimed in with some answers, the pocket slider DOES have a battery compartment and it’s to house a 9V battery, due to the size of the Pocket Slider I’m guessing it’s a PP3 type battery which is a shame as nobody (least of all me) likes the PP3.
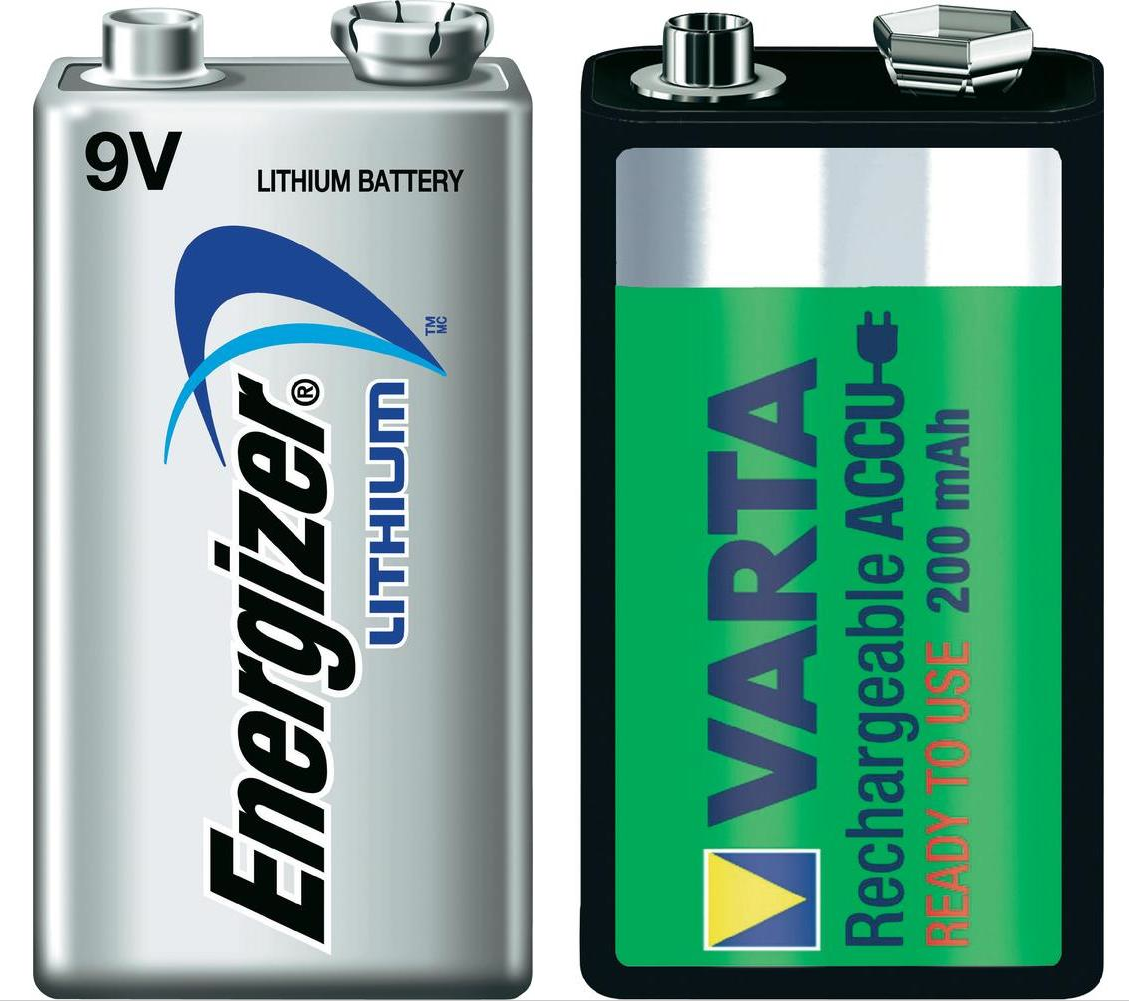
Surely something along the lines of a Canon LP-E6 or similar sized rechargable Lithium Ion chemistry battery would have been a much better choice?? It would be much better capacity for a start, 1800 mAh vs PP3’s 500 mAh (250 mAh at best for rechargeable). Then theres the convenience factor, most of us have these types of batteries already from using 5D, 7D, 60D and 70D etc.

PP3’s don’t transport well, they have large exposed terminals on one face which often short out against any conductive material and are then useless, and you will need a load of PP3’s due to their poor capacity performance they will be running out all the time. Luckily their is a DC jack to power the MoCo, not ideal but it does give a second power option.


I wonder what the mystery is surrounding the magnets that İnanç mentions as being a possible method of connection to the Pocket Slider? “It could be attached to the PocketSlider with the Magnets”. Maybe this is just a language issue.
Is the MoCo attached to the Pocket Slider purely by magnets?? Lots of questions and so far very little detailed information from Edelkrone! I am looking forward to seeing the new video they are currently working on.
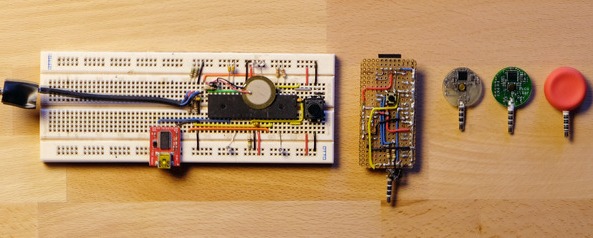
Pico Timelapse
A brilliant little timelapse device on kickstarter!


Their other timelapse devices are pretty cool too!


BeeWorks BW05


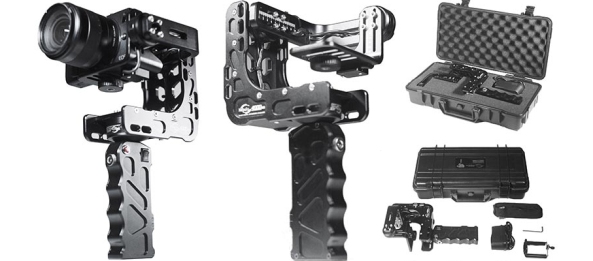
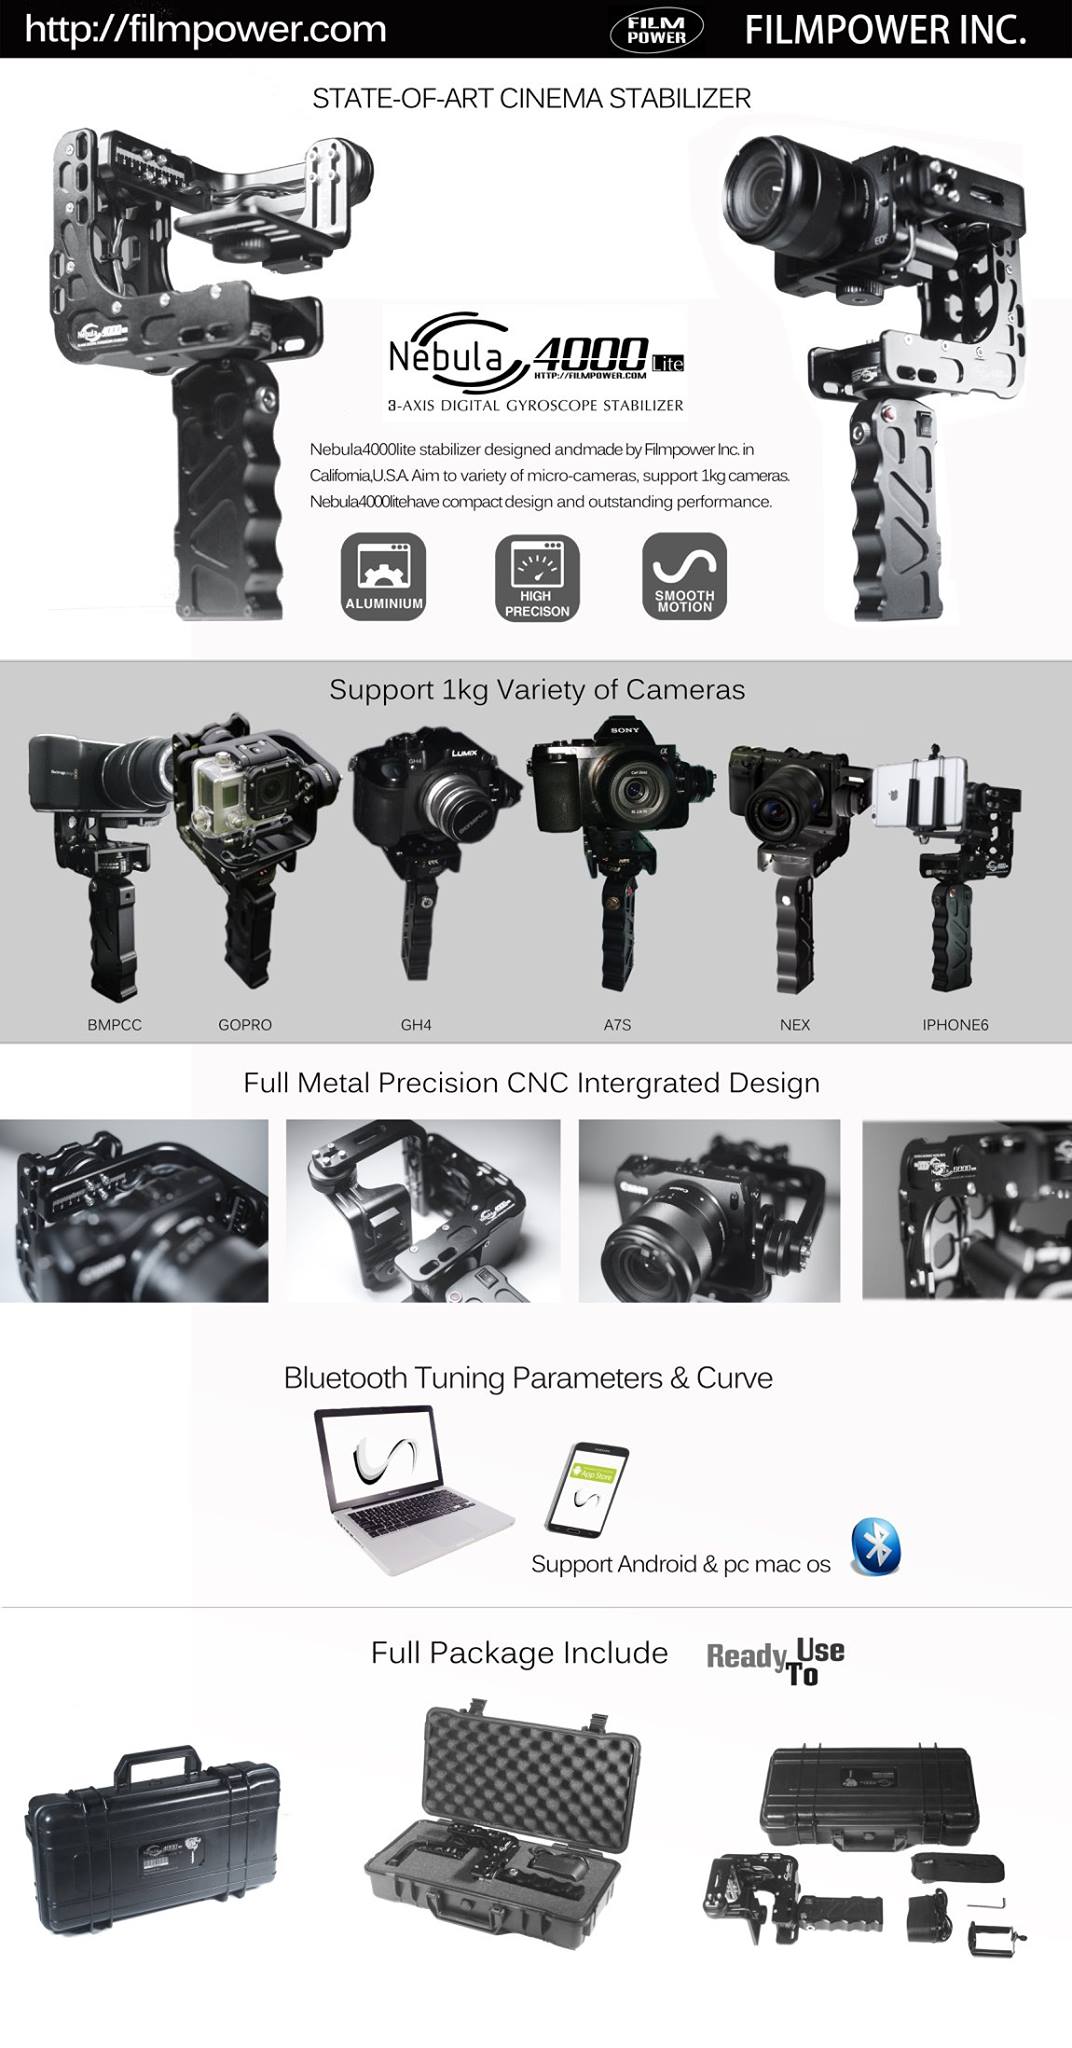
Nebular 4000 Lite Gimbal
A super compact pistol grip style 3 axis gimbal stabiliser
At last we are starting to see some nice compact handheld gimbals suitable for lower payload cameras such as the Sony A7s and Panasonic GH4!
Looks awesome!! Cant wait to get my hand on one!!

More info at Filmpower.com and interesting early experiance video from Dave Dugdale on his youtube channels here, here and here.
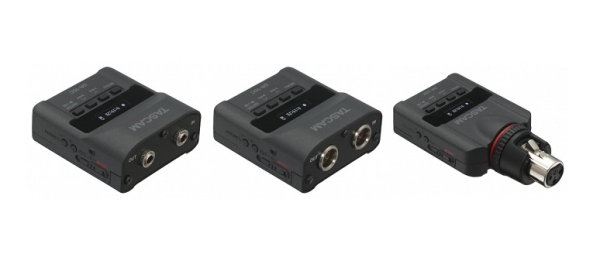
Tascam DR-10 audio recorders
Tascam has brought out a new line of Micro Linear PCM audio recorders
specifically designed with lavaliere and radio microphones in mind.

The DR-10X version intended for XLR mics that don’t require phantom power.

These little audio recorders could be ideal for use with cameras that have less than ideal built in audio capability such as the GH4, BMPCC and pretty much any video DSLR you can think of.

Also they could be very useful as a back up for radio mics in situations where signal interference is a problem for example. I can think of all kinds of filmmaking / sound recording applications for these little audio recorders!

They come in different connector types – 3.5mm jack, Lectrosonic, and or course XLR. With additional connectors such as Shure TAF3 and Sony HiRose catered for by swapping out the top plate.


Powered by a single AAA battery to keep the size down, hence 48v phantom power not being a featured capability. For full specs and more info check out the Tascam product pages.
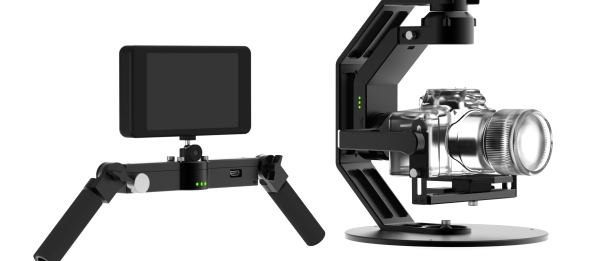
Edelkrone Pocket Slider with Motion Control
Edelkrone Pocket Slider with MoCo
Due for release on the 29th of December 2014
I have to say this little thing really excites me! The thought of being able to execute smooth sliding shots, accurate motion time-lapse and repeatable motion control shots with such compact pieces of kit is just what I and many other filmmakers have been wishing for. Designed by Edelkrone in Turkey it should be well made and fairly simple to use (fingers crossed).

With a relatively short amount of travel (just under 8inches approx 17.5cm) its not for everyone, but for those who like to travel light and especially for those who are using smaller cameras such as the GH4, Sony A7s, BMPCC etc it makes total sense. I have a suspicion the price for the slider will be around the €250, £200, $300 mark plus relevant country taxes. I don’t have any info on pricing for the separate MoCo unit yet, or any technical info. Keep checking the Edelkrone site for updates!!
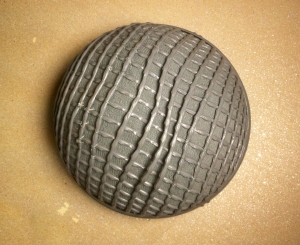
Rycote Windshield Repair
Experimenting with various repair methods.
Rycote windshields are awesome and essential tools that should be in all filmmakers kit box. I had a couple of badly damaged rycote’s, so I decided to bite the bullet and attempt repairing both.
One windshield had suffered trauma to the basket at both ends and along the middle, badly cracked staved in and split. I decided I would need two different methods of repair for each end. One end had clearly taken many blows from being dropped on its nose and the domed front end was badly cracked. The other removable end had also suffered trauma from being dropped but rather than cracking at random points in the basket weave it had sheared at the intersection of the weave, maintaining the full lengths but flapping about making it very fragile and prone to deforming.
I decided the removable dome rear end could be repaired with needle and cotton thread, by sowing a criss cross stitch at every point where the basket weave previously intersected. This is a simple but time consuming technique. I used a tiny dob of super glue on the cotton thread to reinforce it and prevent the thread wearing or loosening over time.

I found sewing through the exterior and securing the thread on the inside made for the tidiest and visually most pleasing repair.

It ends up looking a bit ugly on the inside but who cares, it wont effect sound quality and nobody is going to se it in use anyway!

Once I had sewn all the sheared intersections of the dome it became much firmer and reassuringly robust.


Here you can see all the sewn joints from the outside and inside, this part of the job is DONE!


Next job is to fix the front end dome which was so badly cracked it had totally deformed and was concave in places instead of convex! Sewing wasn’t an option as there wasn’t enough complete structure there to make it work. I had to form new lateral strands for the basket weave. For this i decided the best bet was a hot glue gun!!

I used some rolled up socks forced into the inside of the basket to gentle push the dome end out back into its natural shape so i had a rough hemisphere with which to built my new lattice work of glue on.

The round ring type structure that helps to give some strength and shape to the basket was also cracked in 4 different places around the circumfrence. I also repaired this with hot glue.

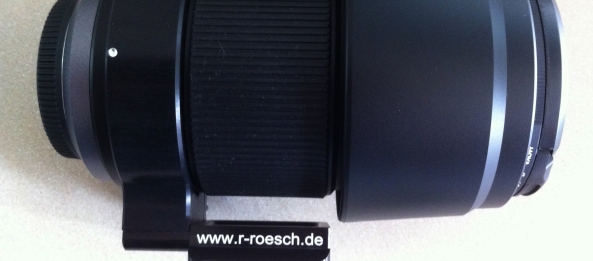
New Arca style foot for Panasonic GH4 and GH3 with battery grip
Could this be the answer to lens mounting Micro 4/3 cameras with battery grips?
Andrea from Roesch Feinmechanik kindly sent me their newly designed Acra Swiss compatible foot that screws into their collars for the Panasonic 100-300mm and 35-100mm lenses. This is the third iteration of foot from Roesch Feinmechanik and demonstrates a progression and evolution. The first foot was not Arca Swiss compatible and was designed to attach to support equipment via two ¼” UNC threads in its base. The second edition incorporates a clever and elegant Arca Swiss compatible dove tail as well as the two ¼” UNC threads.

The new foot is designed to work with battery grip equipped cameras. The foot is essentially the same Arca foot as before but with extra machining at the point where it affixes to the collar.

It’s approximately 2.5mm thinner at one end. The original Arca foot just about clears the GH3 with battery grip when used with the 100-300mm lens. With this new foot you have an extra few mm space between the grip and the foot itself. That is a welcome increase in clearance.

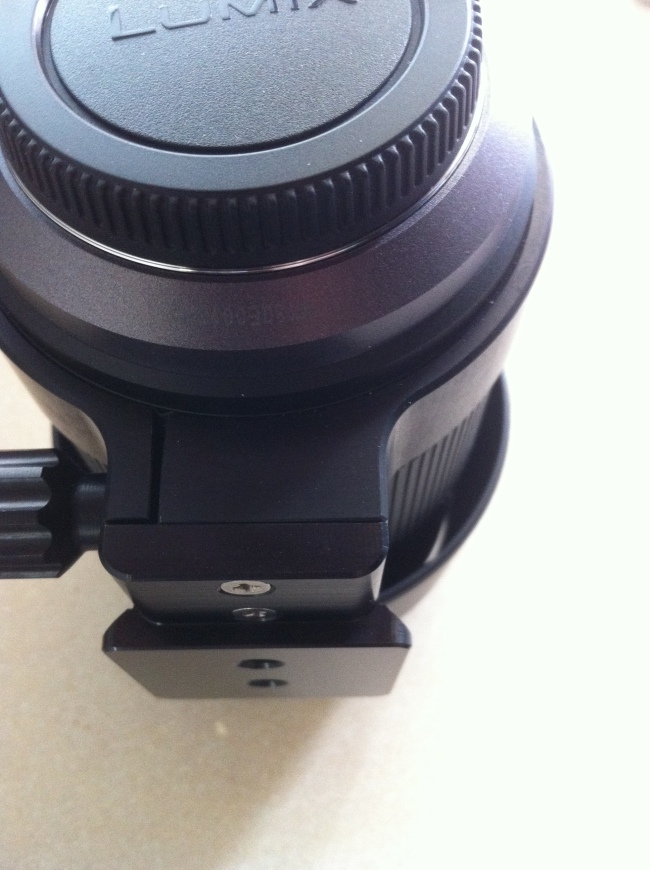

The original Arca foot did not fit with battery grips when used with the 35-100mm lens. I have written an article that shows my solution to the problem (here). Unfortunately this new foot (designed for battery grip equipped cameras) doesn’t work with the GH3 and battery grip (and therefore the GH4 and battery grip). It’s till just a little two tight; about 2mm extra clearance is needed.
In testing with the 100-300mm lens the new foot feels similarly rigid in use, although obviously the reduced thickness will have weekend the foot to a degree. I doubt it will be significant in practice, however I don’t intend on testing its tensile strength out!!

For me the close tolerance fit of the original Arca foot with the 100-300mm lens was not a big problem, I am just careful when mounting and dismounting the lens from the camera when the grip is attached. However if you’re the kind of person who is all fingers and thumbs the extra clearance will certainly prevent cosmetic damage to either the grip or the Arca foot. From an aesthetic and mechanical perspective there is something very pleasing about the newly designed foot! I have to say I prefer its feel, fit and function compared to the original Arca foot. The fact the new foot is still a few mm too tight to allow the 35-100mm lens to clear the grip is a great shame. On the positive side of things hats off to Roesch Feinmechanik for acknowledging the battery grip issue and responding to filmmakers and photographers requests!
